
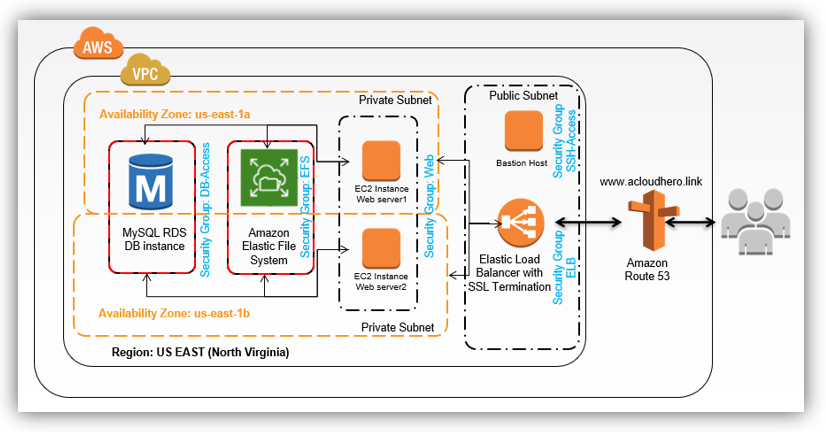
1. WordPress High Availability Architecture:
In the previous lab “How to setup wordpress on Amazon EC2 and RDS“, you have learned by practicing some basic AWS services and functionalities, like EC2 instance, RDS Database instance, private and public subnets, security groups and so on.
This lab is an improved version of the previous one, I will introduce new AWS services that will allow us to make our infrastructure resilient, more secure and scalable:
- Amazon Route 53: it’s a DNS service that get user requests (www.domain.com) and redirect it to endpoints then reply to end users requests.
- Bastion host: the only server that you can connect to it using SSH from the internet, then jump to private servers in your VPC.
- NAT Gateway: allow private instances to connect to internet without being reachable from public network, it will allow for example our internal servers to download files, updates..,
- Elastic Load Balancer: ELB is a highly available service that distributes traffic across Amazon EC2 instances and includes options that provide flexibility and control of incoming requests to Amazon EC2 instances.
- Amazon Elastic File System: EFS is a file storage service for Amazon EC2 instances. Multiple Amazon EC2
instances can access an Amazon EFS file system at the same time, providing a common data source for the content of the WordPress site running on more than one instance.
2. Building the High Availability Architecture:
2.1 Registering domain name on Route 53:
To complete this lab, and it is not a requirement at all, I have ordered this domain name: acloudhero.link, I have chosen “.link” name extension because it is the cheapest choice on AWS 🙂
To learn the whole process of registering a domain name on AWS Route 53, just click this article that will guide you step by step.
I will use the domain name to connect it to our wordpress website www.acloudhero.link, I will attach it to an Elastic Load Balancer that will redirect incoming http requests to two internal web servers, thus we will create a High Availability for web tier.
2.2 Installing and configuring a Bastion host:
A bastion host is a secure host that accepts SSH connections only from trusted sources like static IP addresses of your Internet connection, this ensures that the access to your AWS resource is from a machine within your network.
We use a bastion host to administer AWS network and instances.
Because we will move all web servers to private subnets, thus they will not be reachable directly from the internet, all these instances must accept SSH connection only from the bastion security group.
To learn how to setup and configure a bastion host, follow this article: “Configuring a Bastion host for EC2 instances“.
2.3 Configuring subnets:
For this lab, we will be using these subnets:
| Subnet | Availability Zone | IPv4 CIDR | Status | Description |
|---|---|---|---|---|
| Private-1a | us-east-1a | 172.31.96.0/20 | Already created in previous lab | Was used for RDS database, and will be used also for Web servers. |
| Private-1b | us-east-1b | 172.31.80.0/20 | Already created in previous lab | Was used for RDS database, and will be used also for Web servers. |
| Public-1a | us-east-1a | 172.31.112.0/20 | Already created in previous lab | Was used for Web servers, now it will be only used for Bastion host and Elastic Load Balancer. |
| Public-1b | us-east-1b | 172.31.128.0/20 | To be created or just use a default subnet | Will be used for Elastic Load Balancer, as ELB require at least 2 public subnet. |
2.4 Configuring Security Groups:
We are going to need to create new security groups and update other ones as follow:
| SG Name | Protocol/Port | Source | Description | Comment |
|---|---|---|---|---|
| DB-Access | MySQL/Aurora Port: 3306 | Web-Servers My public ip address | Allow access to mysql from web server | Already created in previous lab. |
| SSH-Access | SSH, port 22 | 0.0.0.0/0.0.0.0 (Any source) | Allow access to bastion host On production, it is not recommended to use 0.0.0.0/0.0.0.0, instead, use your on-premise public ip address | To be created, and added in inbound rule. |
| Web-Access | HTTP, port 80 | SG: ALB-Access | Allow Elastic Load Balancer to redirect http traffic to internal web servers | To be updated. This security group was already created in previous lab, but the source was 0.0.0.0/0.0.0.0, everyone could connect directly to web servers, now, we have to restrict http traffic to only Elastic Load Balancer |
| Web-Access | SSH, port 22 | SG: SSH-Access | Allow Bastion host to connect to web servers using SSH | To be added in Security Group Web-Access inbound rule |
| SG-ALB | HTTP, port 80 | 0.0.0.0/0.0.0.0 | Open http port for public. | To be created, and added in inbound rule. |
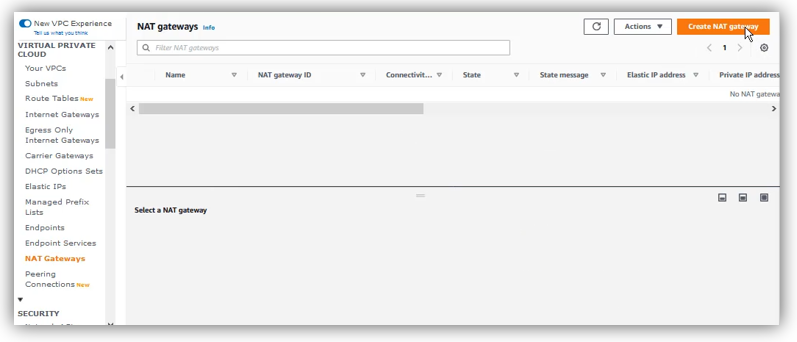
2.5 Creating and configuring a NAT Gateway:
To add a NAT Gateway, make sure you are in “us-east-1” N.Virginia region, open VPC dashboard, then click on “NAT Gateways” / “Create NAT gateway”:
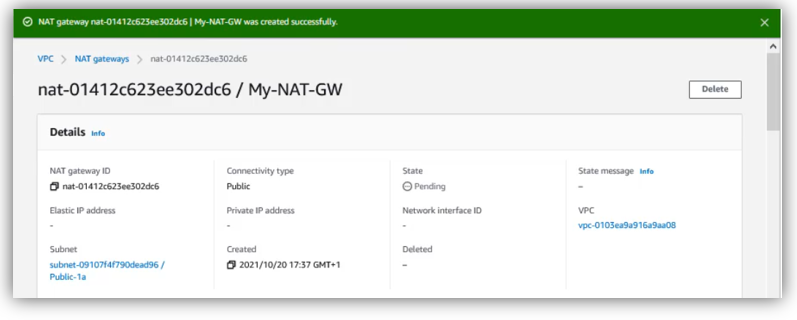
Choose a name for NAT Gateway, select a public subnet, in my case, I have chosen “Public-1a” subnet, for connectivity type, select “Public” and click on “Allocate Elastic IP”:

When creating NAT gateway, it starts with “Pending” state, then once it is operationnal, the state become “Available”, this process take some minutes to be finished:
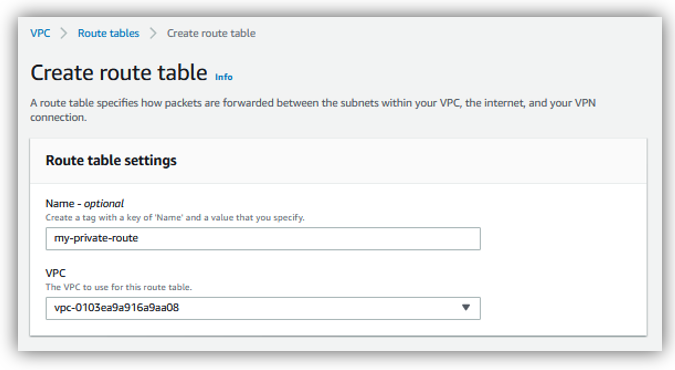
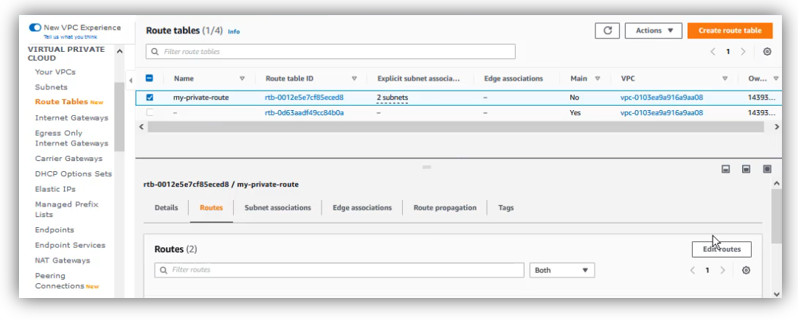
2.6 Creating and configuring a route table for private instances:
On VPC dashboard, click on “Route Tables” then in the right window, click on “Create route table”:

Choose a name of routing table and select the right VPC, then click on “Create route table”:
Select the private route table, then click on “Routes” tab, and click on “Edit routes”:
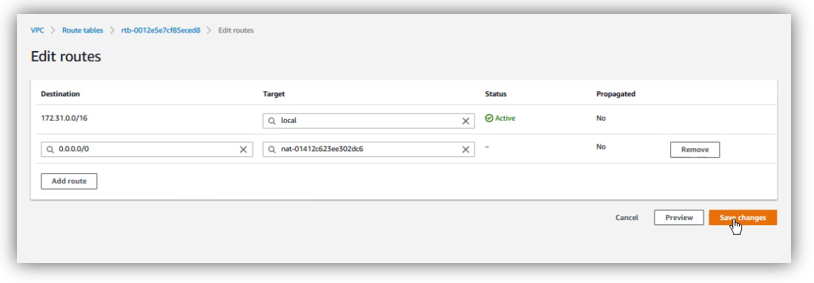
Now, we add a new route like this:
- Destination: 0.0.0.0/0
- Target: choose nat gateway
Then, click on save changes.
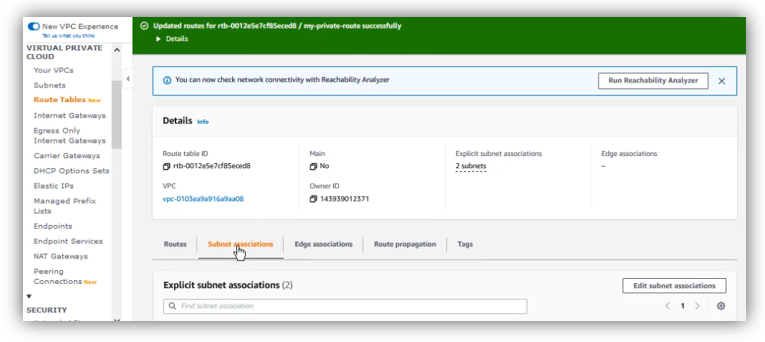
Now, click on “Subnet associations” tab, then click on “Edit subnet associations”:
Select both private subnets, then click on “Save associations”:
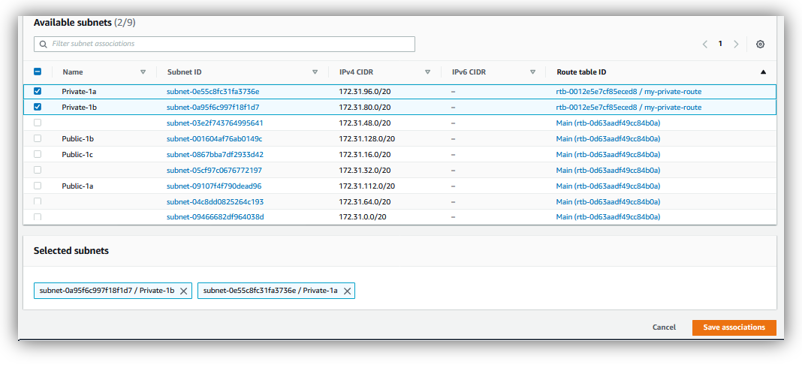
Whenever there is any instances belonging to these two private subnets: 172.31.96.0/20, 172.31.80.0/20, “my-private-route” will be used and redirect internet traffic to NAT gateway:
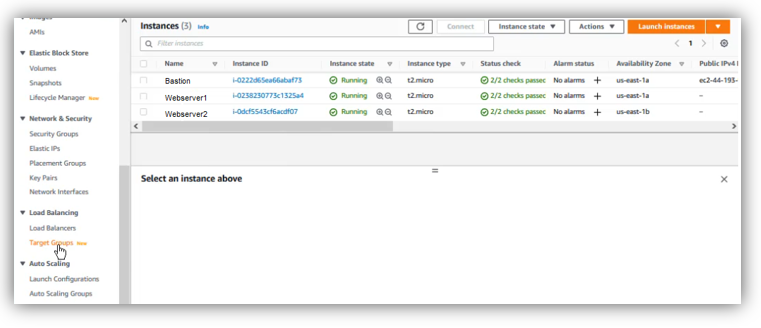
2.7 Launching Two EC2 instances: Webserver1 and Webserver2
We will create two EC2 instances, follow the previous lab to guide you step by step, but make sure that these EC2 instances must have this configuration:
- First EC2 instance: Webserver1
- Subnet: private-1a | us-east-1a
- User data script: the same script will be added on both instances, check below:
- Security-group : choose Web-Access
- Second EC2 instance: Webserver2
- Subnet: private-1b | us-east-1b
- User data script: the same script will be added on both instances, check below:
- Security-group : choose Web-Access
- User data script:
#!bin/bash

sudo yum update -y

sudo yum install -y httpd httpd-tools mod_ssl

sudo yum install amazon-linux-extras -y

sudo amazon-linux-extras enable php7.4

sudo yum clean metadata

sudo yum -y install php php-common php-pear

sudo yum -y install php-cli php-pdo php-fpm php-json php-mysqlnd php-gd

sudo systemctl enable httpd

sudo systemctl restart httpd

sudo usermod -a -G apache ec2-user

sudo chmod 2775 /var/www

wget https://wordpress.org/latest.tar.gz

tar -xzf latest.tar.gz

cp -r wordpress/* /var/www/html/

sudo chown -R apache /var/www

sudo chgrp -R apache /var/www
2.8 Connecting both Webservers to Mysql RDS database instance:
In the previous lab, we have added a Mysql RDS database instance, we can use the same database or create one for this lab:
To connect to Webserver1, get its private ip address, far example: 172.31.103.90, then connect to your Bastion Host, after that, type:
ssh -i aziz-pkey.pem 172.31.103.90
Where:
- aziz-pkey.pem is your private key
- 172.31.103.90 is the private ip address of your internal server.
Once connected to Webserver1, we configure database connection like this:
sudo cp /var/www/html/wp-config-sample.php /var/www/html/wp-config.php
sudo nano /var/www/html/wp-config.php
On the wp-config.php file, we update the values of these fields, then save the file:
define( ‘DB_NAME’, ‘db1’ );
/** MySQL database username */
define( ‘DB_USER’, ‘admin’ );/** MySQL database password */
define( ‘DB_PASSWORD’, ‘MyPassword’ );/** MySQL hostname */
define( ‘DB_HOST’, ‘db1.cdhpcrxxxxxx9.us-east-1.rds.amazonaws.com’ );
We repeat the same steps for Webserver2.
2.9 Configuring an Elastic Load Balancer:
Firstly, we have to add a Target Group that will be attached to Elastic Load Balancer.
On EC2 dashboard, open “Load Balacing” / Target Groups and click on “Create a Target Group”.
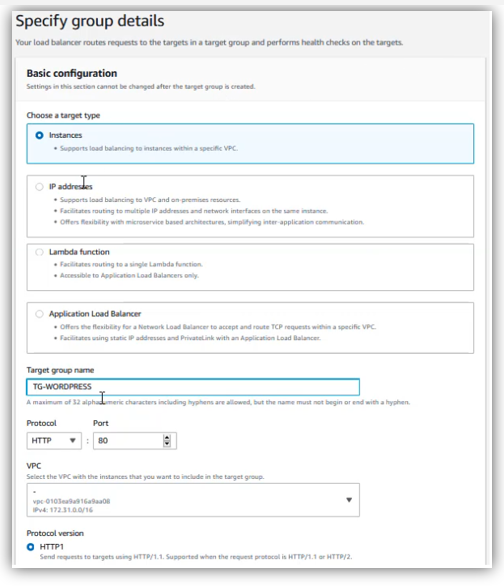
Specify group details:
- For target type, choose “Instances”
- Target group name: TG-WORDPRESS
- Choose the default vpc
then click on “Next”
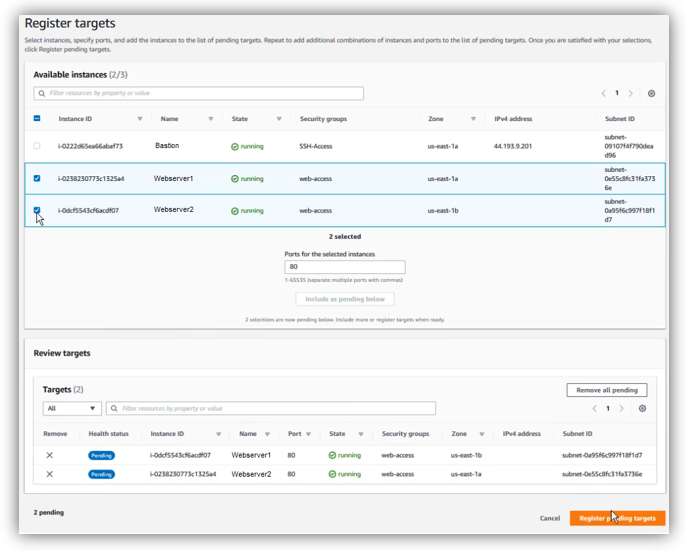
Select both Webservers, then click on “Include as pending below”, after that click on “Create Target Group”
Open “Load Balancing” / “Load Balancers”, then click on “Create Load Balancer”
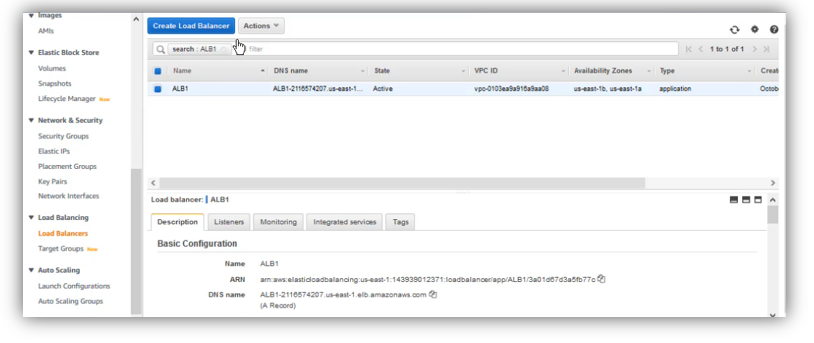 Choose create an “Application Loader Balancer”, then specify these details:
- Load balancer name: ALB-WORDPRESS
- Choose default VPC.
- Mappings: select these two Availibity Zones: us-east-1a and us-east-1b, then for:
- us-east-1a: choose public-1a subnet
- us-east-1b: choose public-1b subnet
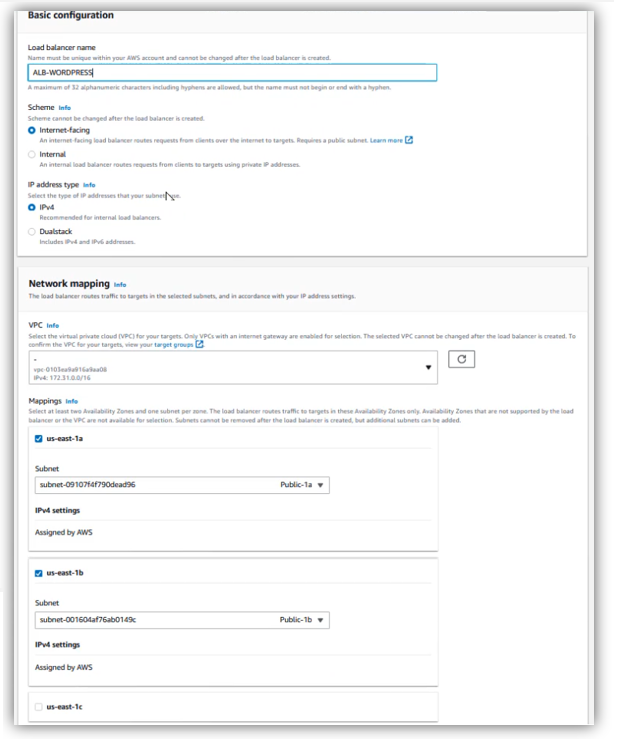
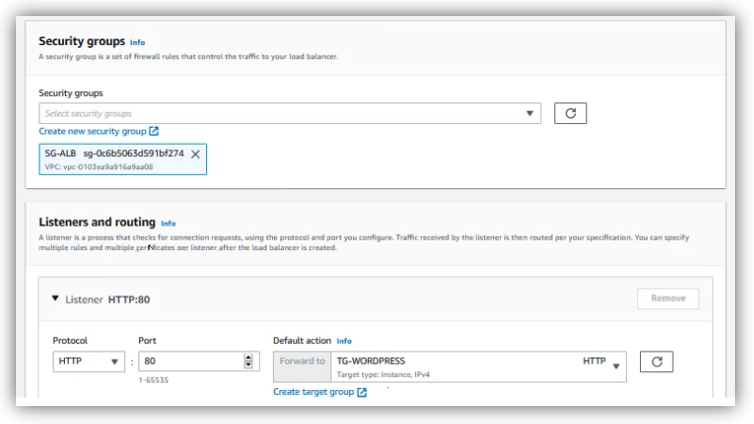
- Security Group: choose the one configured for ALB, “SG-ALB”
- On the Listener HTTP:80, Default action / Forward to: choose “TG-WORDPRESS”, then click on “Create Load Balancer”
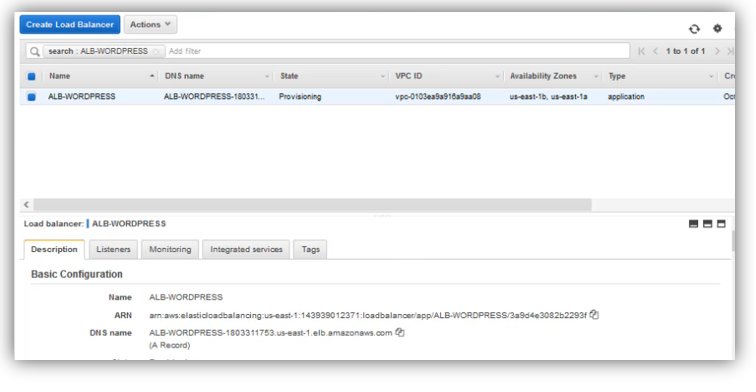
The Application Load Balancer state is “Provisioning”, wait some minutes before it switches to
“Active”.
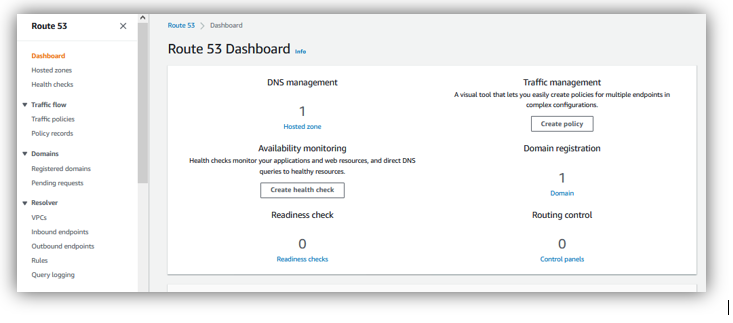
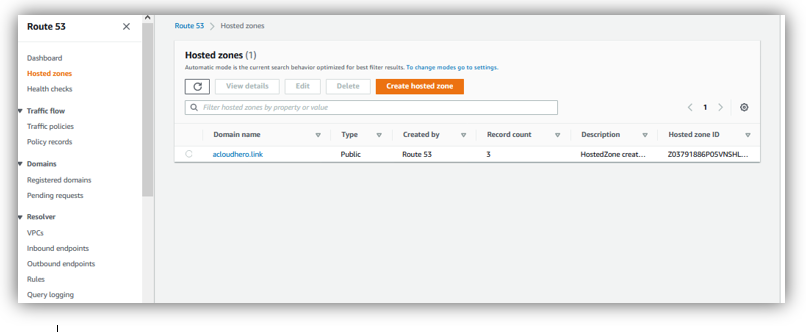
2.10 Configuring Route 53:
Copy Application Load Balancer DNS name, then open Route 53 dashboard, after that, click on “Hosted Zone”.
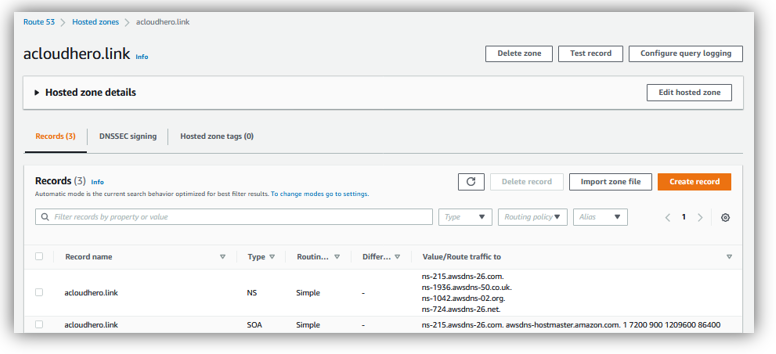
Click on your domain name: “acloudhero.link”
click on “Create record”
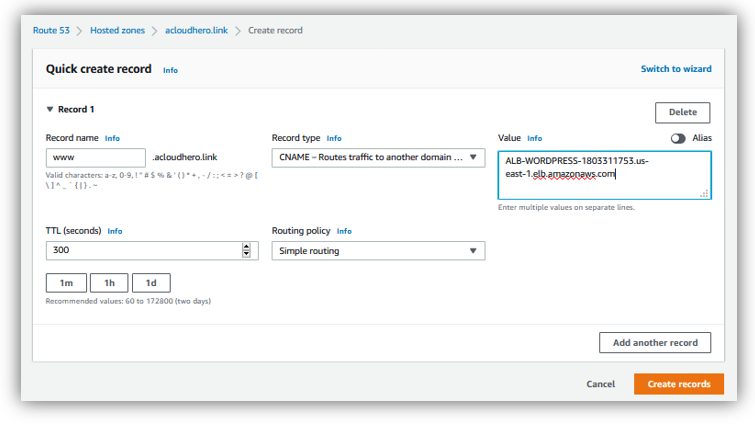
Specify these details:
- Record name: www
- Record type: choose “CNAME” that will routes trafic to another domain
- Value: add Application Load Balancer dns name
Click on “Create records”
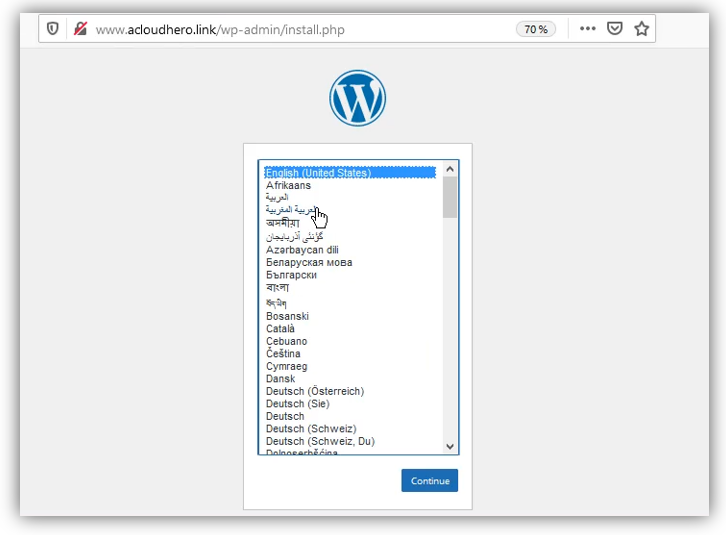
3. Configuring WordPress
Open www.acloudhero.link, choose your langage, then click on “continue”:
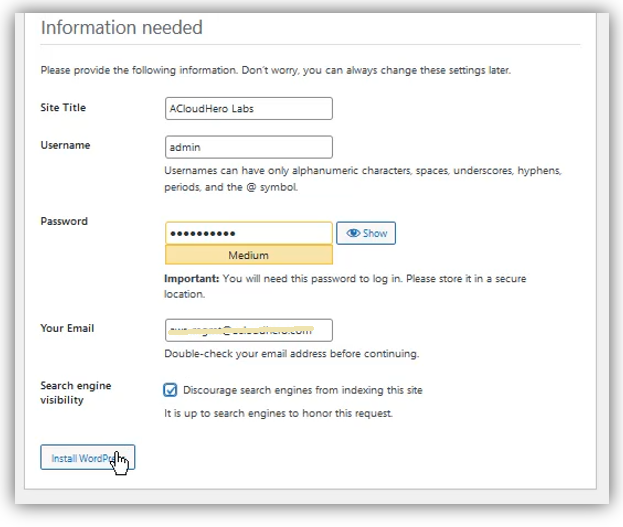
Add these details, then click “Install WordPress”:
- Site Title: ACloudHero Labs
- Username: it’s the admin of wordpress
- Password: WordPress admin password.
- Email: admin email address, it can be used for authentication or to reset password if necessary.

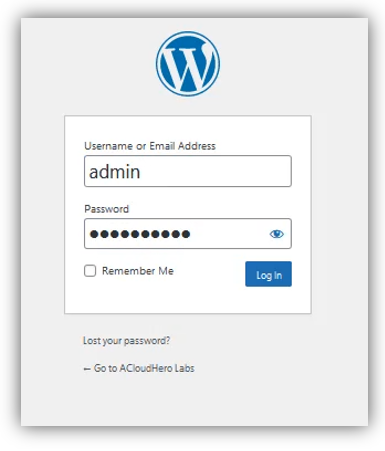
WordPress is installed successfully, click on “Log in”: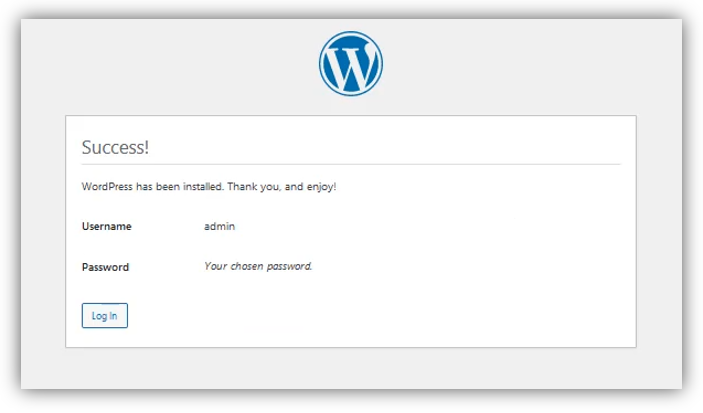 Authenticate using your username and password:
4. Publishing new articles in WordPress
Connect now to wordpress dashboard: www.yourdomain.com/wp-admin
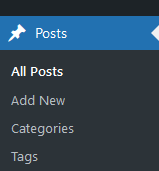
In the left menu, click on Posts / Add New:
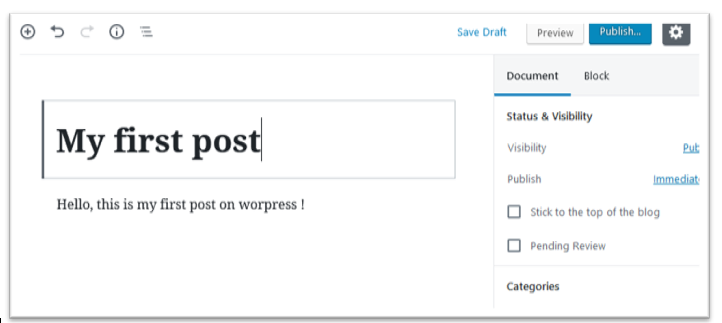
Add a title for this new post, far example: My first post and body text:
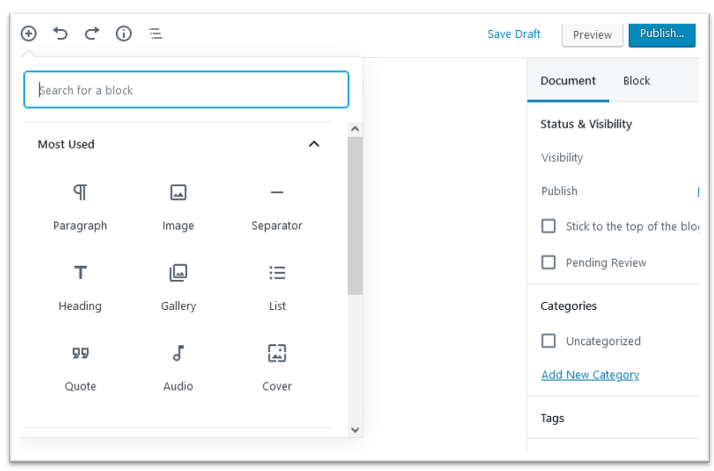
Click on (+) sign / “Image” and choose any image on your local machine, then click on “Publish”.
Let’s open our website now, the blog post is correctly published and the image is displayed.
Let’s now refresh web browser, the blog post is still there “Title & content”, but the image is not displayed !.
As we are using two web servers using the same RDS mysql database and that are running behind an Application Load Balancer, all articles and posts are stored in RDS database whereas all uploaded files (images, pdf…) are stored in only one web server each time, the local path is: /var/www/html/wp-content/uploads, to resolve this issue, we will use a shared storage where to store wordpress files, thus all webservers will share the same files.
5. Configuring Elastic File System
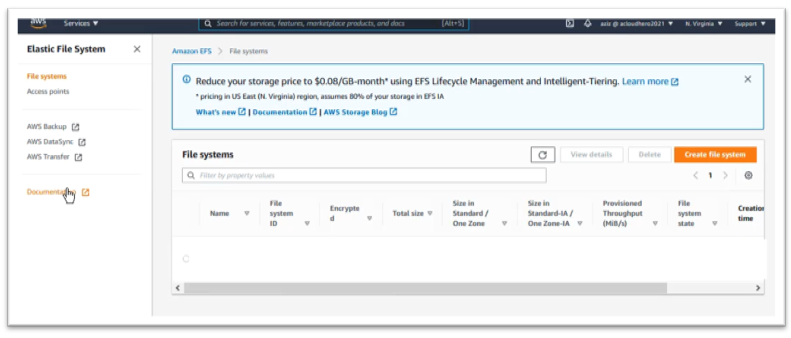
At the top menu, click on Services / and search for EFS then click ok, this will open Elastic File System dashboard, click on Create file system.
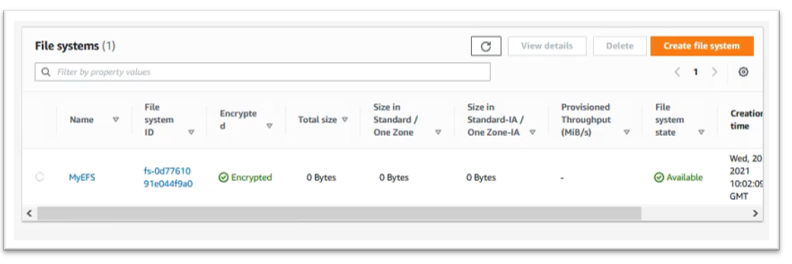
Add a name for your file system, far example: MyEFS, then choose your VPC and for Availability, select “Regional” then click on “Create”

Your EFS file system will be created then its state will switch to “Available”
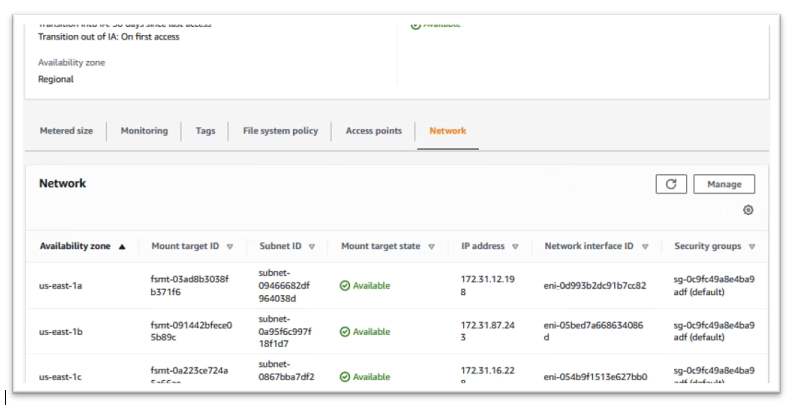
Click on your file system, / “Network” tab then copy the id of Security groups
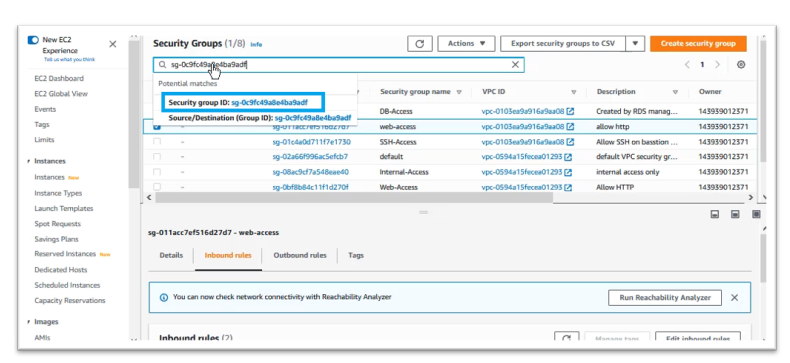
Open EC2 dashboard, in the left menu, choose “Network & Security” / “Security Groups”
At the search menu, paste EFS security group id then click on the Security Group ID displayed
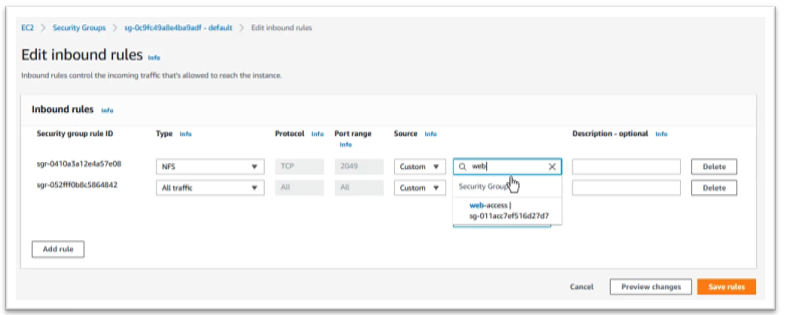
 Click on “Inbound rules” tab, then click on “Edit inbound rules”

Add new rule as follow:
- Type: NFS
- Source: web-access security groups
Then click on “Save rules”
6. Testing WordPress High Availability
Connect to First EC2 instance using bastion host, then execute these commands:
# 1. Install amazon-efs-utils on EC2
sudo yum -y install amazon-efs-utils# 2. Create mount directory
sudo mkdir /mnt/efs# 3. Get EFS id from EFS dashboard and mount file system
sudo mount -t efs fs-0d7761091e044f9a0:/ /mnt/efs# 4. Move wordpress file to EFS share:
sudo mv /var/www/html/* /mnt/efs/# 5. Rename local directory:
sudo mv /var/www/html/ /var/www/html.SAV# 6. Make sym links, then restart httpd service
sudo mkdir /var/www/html
sudo ln -s /mnt/efs/* /var/www/html/
sudo service httpd restart
Execute the same commands on the Second EC2 instance.
Now, to test if all is ok, perform the following steps:
- Connect to wordpress dashboard and add new post with an image
- Check if post is correctly published and image is displayed.
- Refresh your web browser, the new post with its image are still correctly displayed.
- Add a second post with another image
- Refresh again the web browser, all the new posts are correctly published and their images are displayed.
We can now switch off one EC2 instance, and wordpress website will still remain reachable.
Add new posts with new images, turn on the web server and switch off the second server, you will notice that the website will remain the same as all files are uploaded in a shared storage using Elastic File System.